2021년 8월
2021-08-03#
즉시 실행 함수#
함수의 정의와 동시에 실행되는 함수를 즉시 실행 함수(IIFE, Immediately Invoke Function Expression)라고 한다. 최초 한 번만 호출되며 다시 호출할 수는 없다. 이러한 특징을 이용하여 최초 한 번만 실행이 필요한 초기화 처리 등에 사용할 수 있다.
자바스크립트에서 가장 큰 문제점 중의 하나는 파일이 분리되어 있다 하여도 글로벌 스코프가 하나이며 글로벌 스코프에 선언된 변수나 함수는 코드 내의 어디서든지 접근이 가능하다. 따라서 다른 스크립트 파일 내에서 동일한 이름으로 명명된 변수나 함수가 같은 스코프 내에 존재할 경우 원치 않는 결과를 가져올 수 있다.
즉시 실행 함수 내에 처리 로직을 모아 두면 혹시 있을 수도 있는 변수명 또는 함수 명의 충돌을 방지할 수 있어 이를 위한 목적으로 즉시 실행 함수를 사용되기도 한다.
익명 즉시 실행 함수#
기명 즉시 실행 함수#
- 함수 내부에서 자신을 호출 할 경우 사용한다.
Error#
다른 방식#
2021-08-10#
구조 분해 할당(destructuring assignment)#
- 객체나 배열을 변수로
분해할 수 있게 해주는 특별한 문법
배열 분해하기#
- 문자열 분해 해서 할당하기
- 쉼표를 사용하여 요소 무시하기
- 변수 교환 트릭
- ...로 나머지 요소 가져오기
- 할당하고자 하는 변수의 개수가 분해하고자 하는 배열의 길이보다 많은 경우
- 할당할 값이 없을 때 기본으로 할당해 줄 값 설정하기
객체 분해하기#
- 변수의 순서는 중요하지 않다.
- 객채 프로퍼티를 프로퍼티 키와 다른 이름을 가지는 변수에 할당 하는법
- 프로퍼티가 없는 경우를 대비하여
=을 사용해 기본값을 설정하기
- 콜론과 할당 연산자를 동시에 사용할 수 있다.
- 나머지 패턴
...를 사용하여 나머지 프로퍼티를 할당하기 - IE를 비롯한 몇몇 구식 브라우저는 나머지 패턴을 지원하지 않으므로 주의해서 사용해야 한다. 바벨(Babel)을 이용할 경우 사용 가능
- 기존 변수에 할당하기
( )를 생략하면 코드 블록으로 인식하여 에러 발생
- 중첩 구조 분해
- 함수 매개변수에 사용하기
2021-08-24#
discord bot 만들기#
- bot 생성하고 초대하기
- discord.js 패키지 설치하기
- discord bot 온라인 상태로 만들기
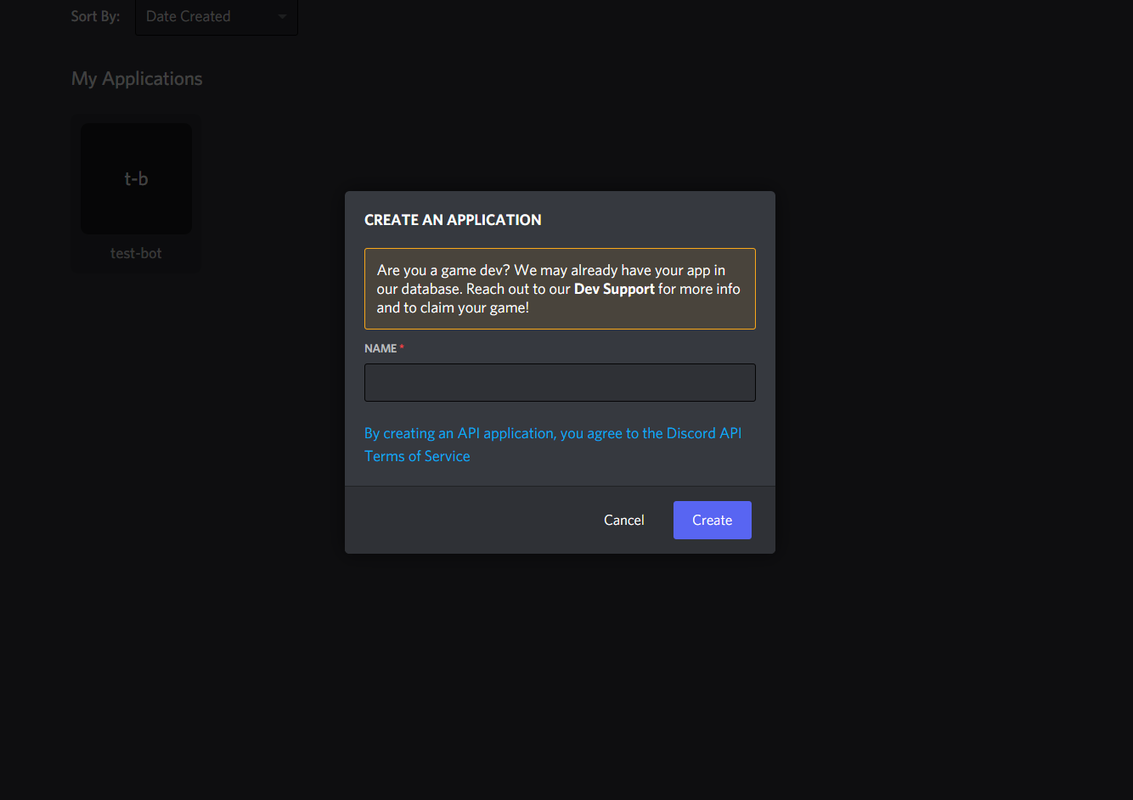
bot 생성하고 초대하기#
디스코드 개발자 포털 https://discord.com/developers/applications
어플리케이션 생성

이름설정
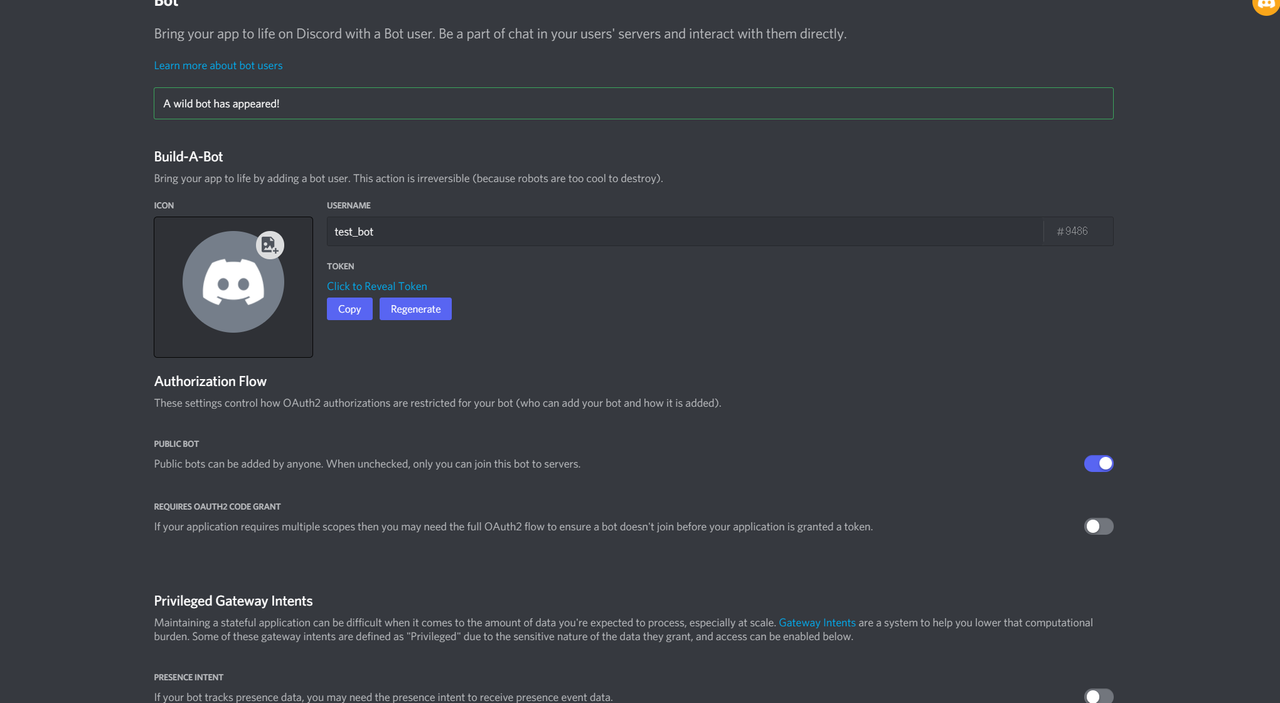
bot 생성하기

token 확인하기
bot 초대 url 만들기
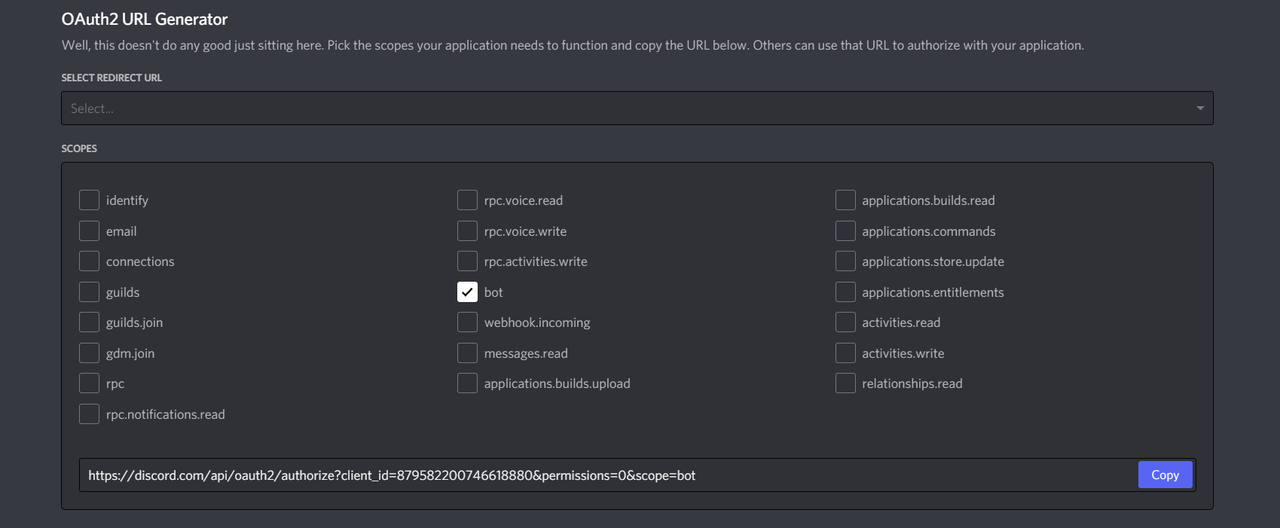
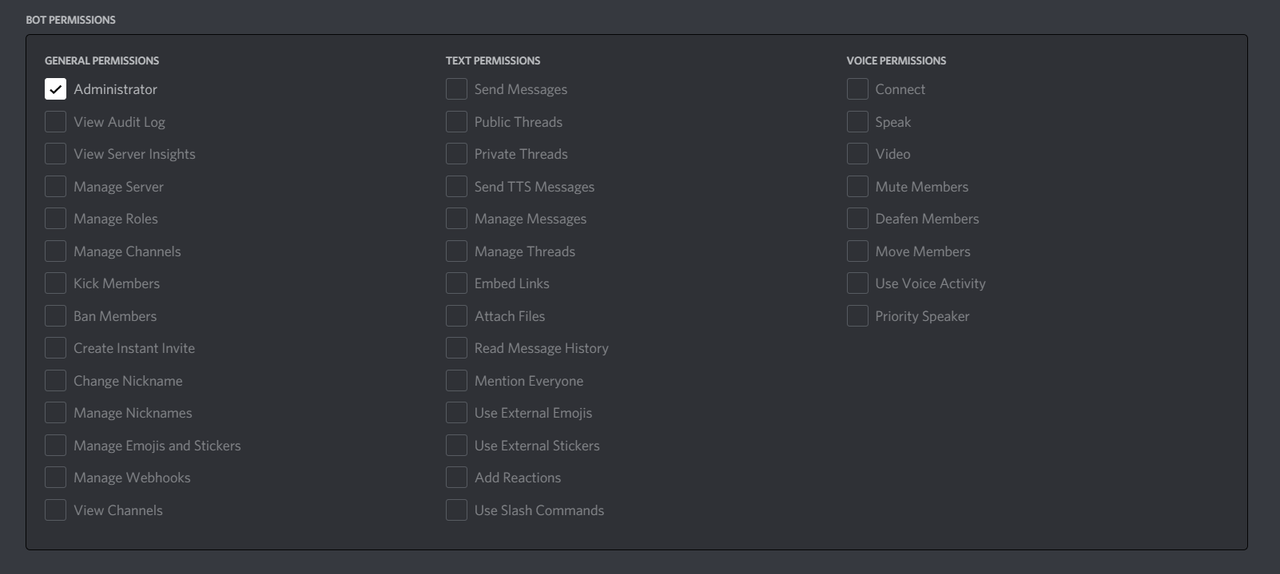
봇 권한 설정하기
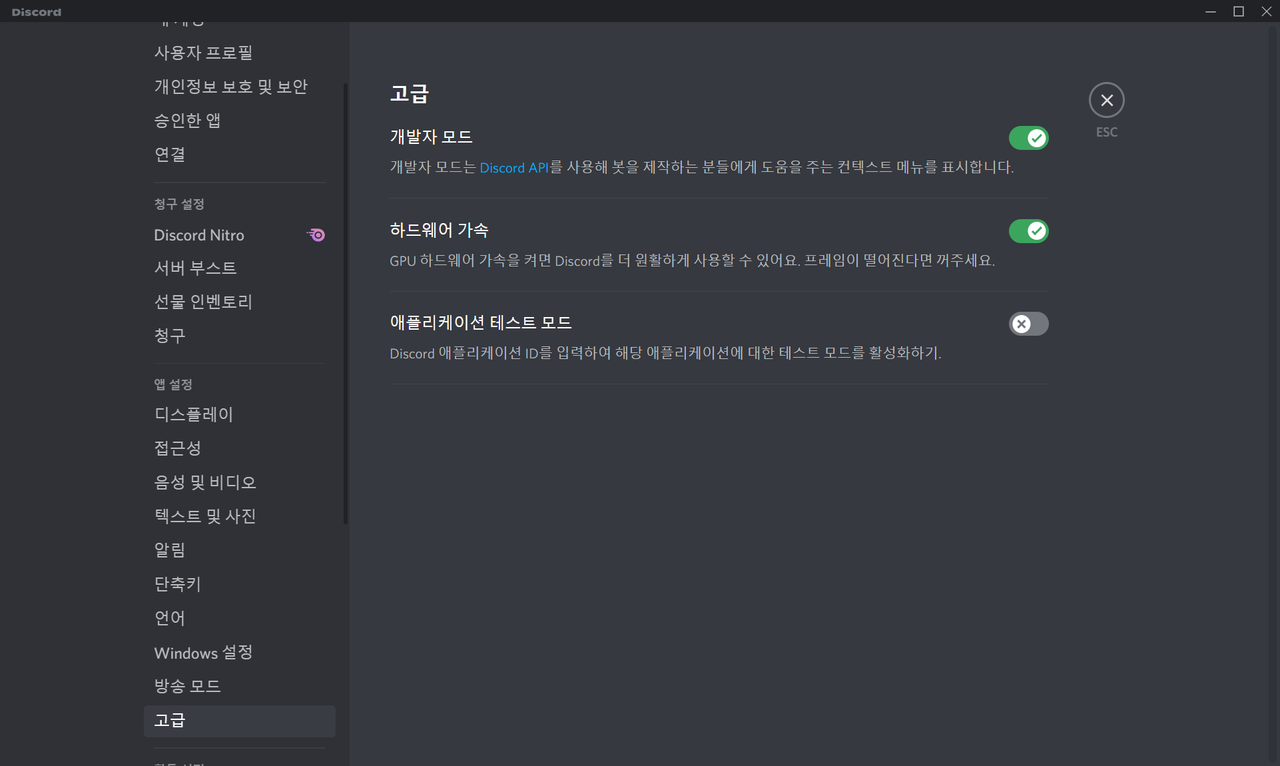
개발자모드 설정하기
discord.js 패키지 설치하기#
discord.js 공식 페이지 https://discord.js.org/#/
npm install
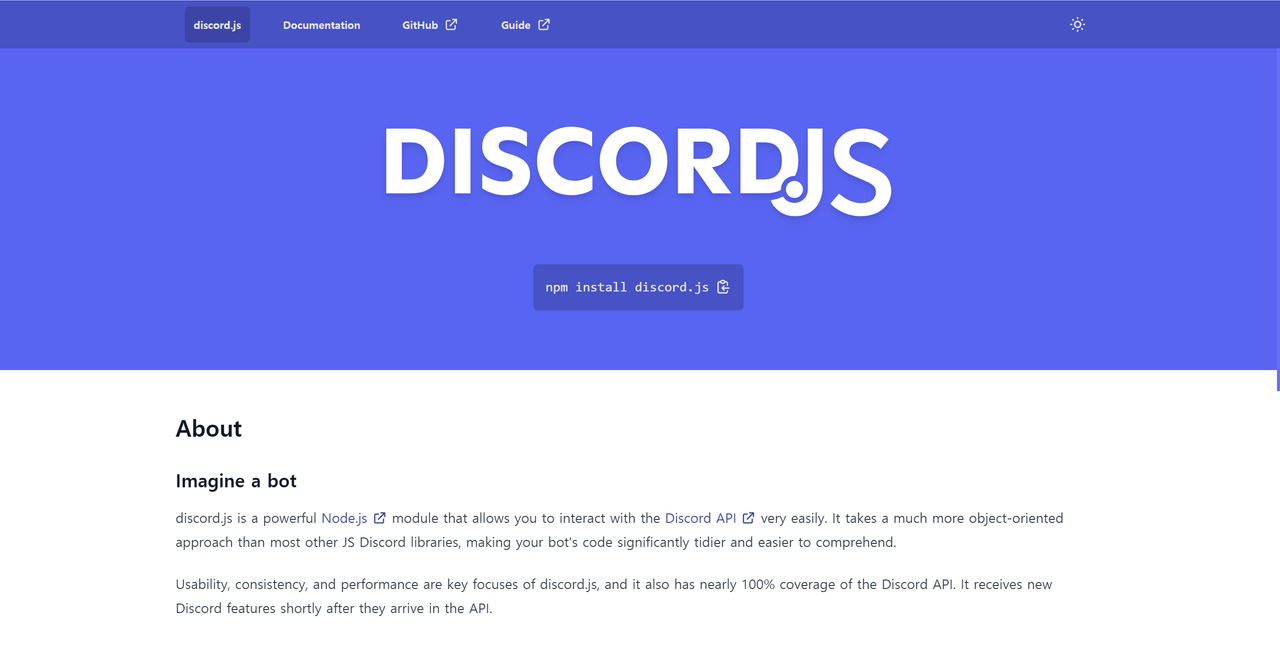
discord.js 13버전은 Node 16.6 이상이 필요함.
discord bot 온라인 상태로 만들기#
package.json
index.js
2021-08-31#
Papago API를 활용한 번역기 bot 만들기#
Papago API 활용하기#
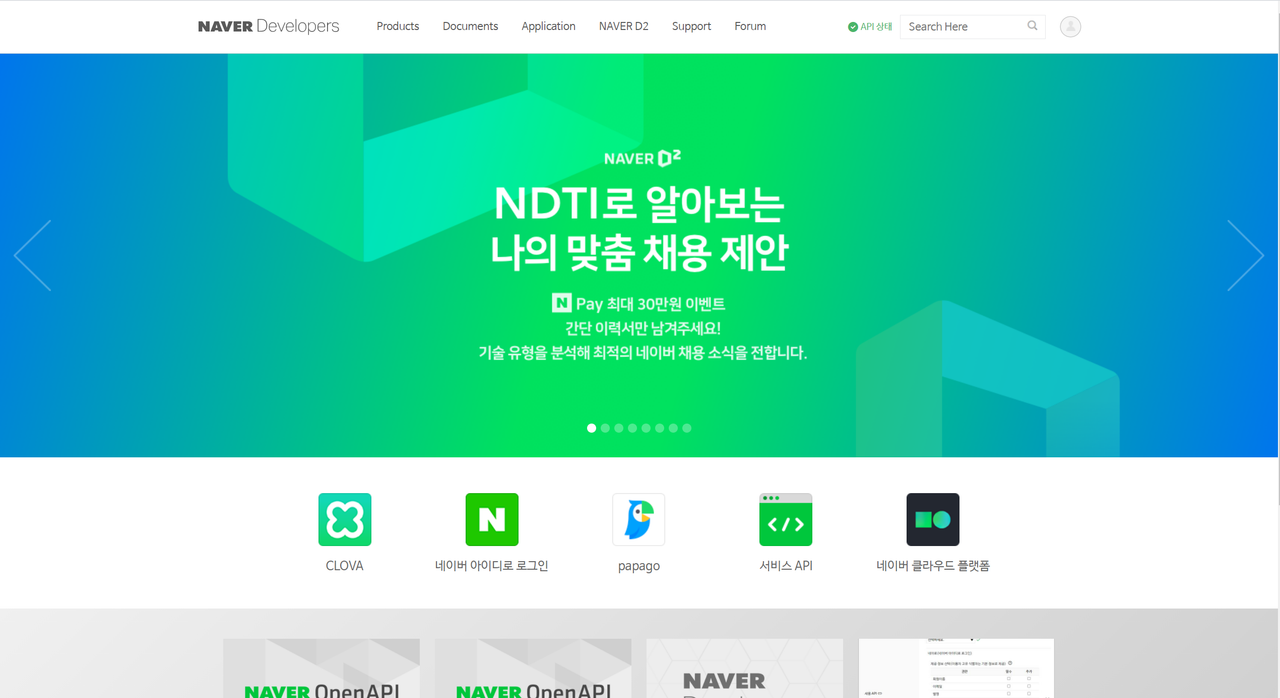
Papago API를 사용하기 위해서는 NAVER Developers 사이트에서 어플리케이션 등록을 해야 한다.
NAVER Developers: https://developers.naver.com/main/
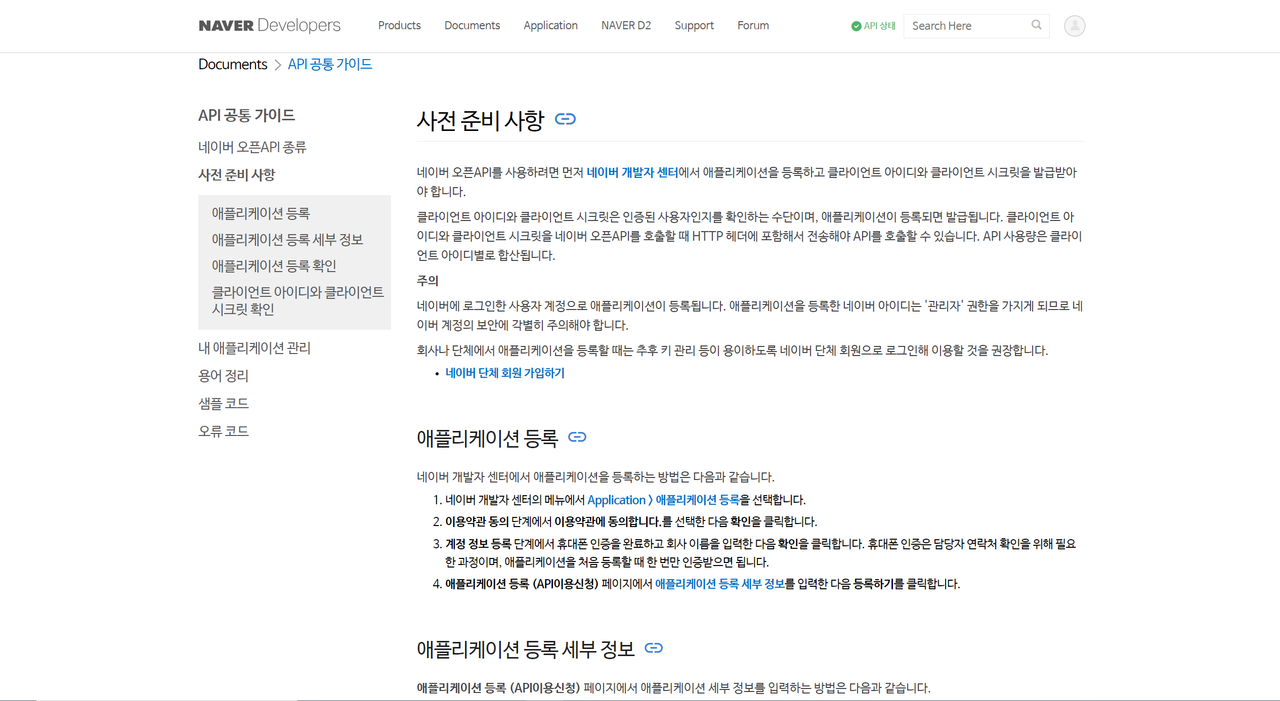
애플리케이션 등록 방법은 아래 링크에서 확인할수 있다.
사전 준비사항: https://developers.naver.com/docs/common/openapiguide/appregister.md
애플리케이션 등록하기#
https://developers.naver.com/apps/#/wizard/register
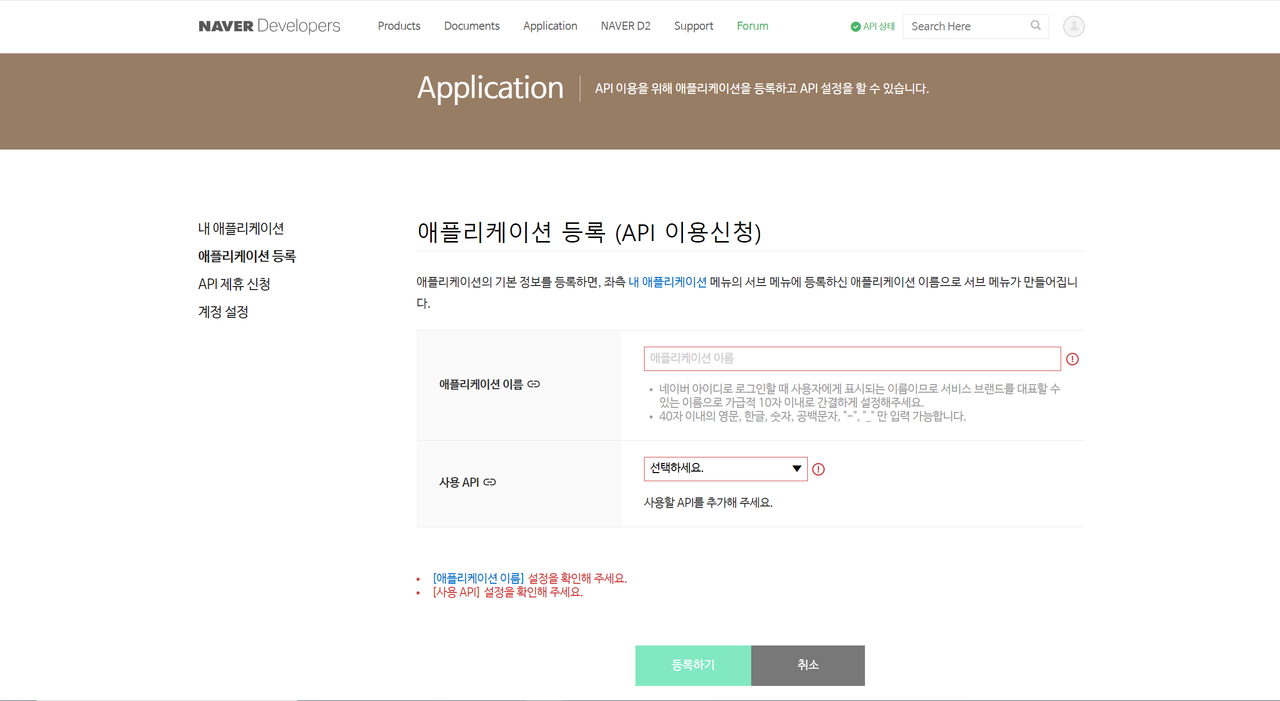
- 애플리케이션 이름 부분에 자신의 애플리케이션 이름을 작성하면 됩니다.
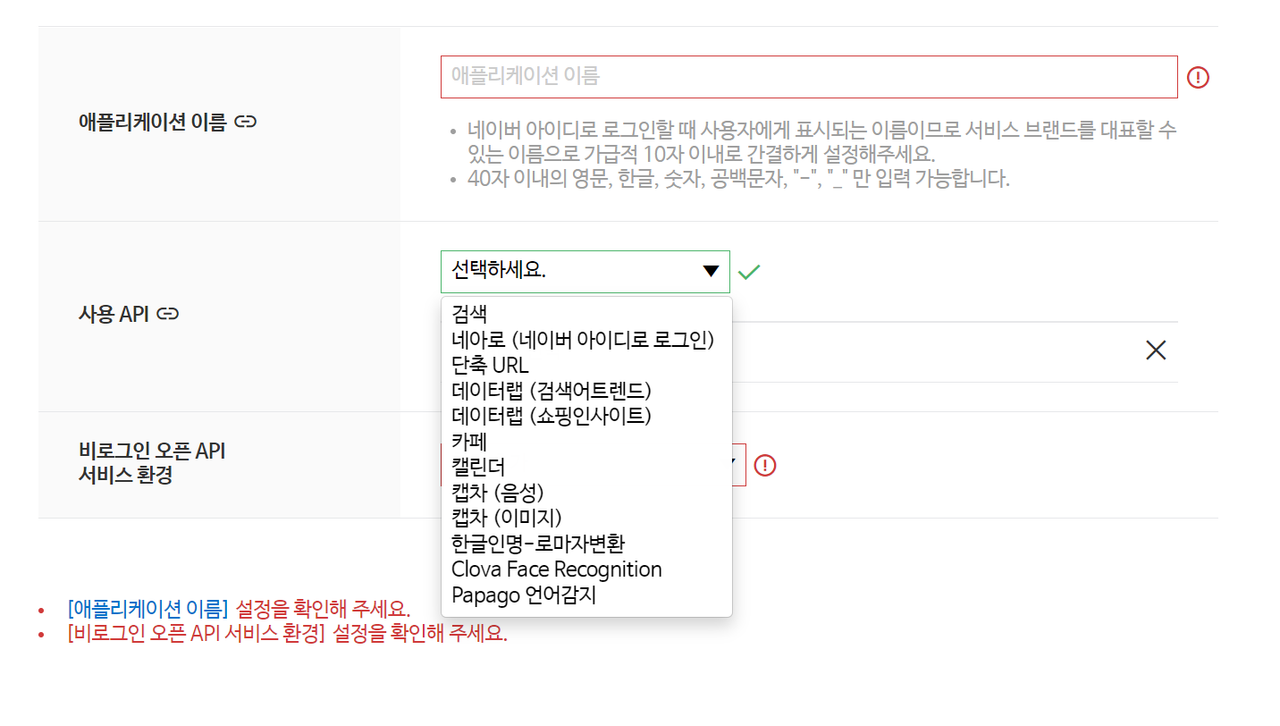
- 사용할 API를 목록에서 고르면 됩니다. 중복 선택 가능!
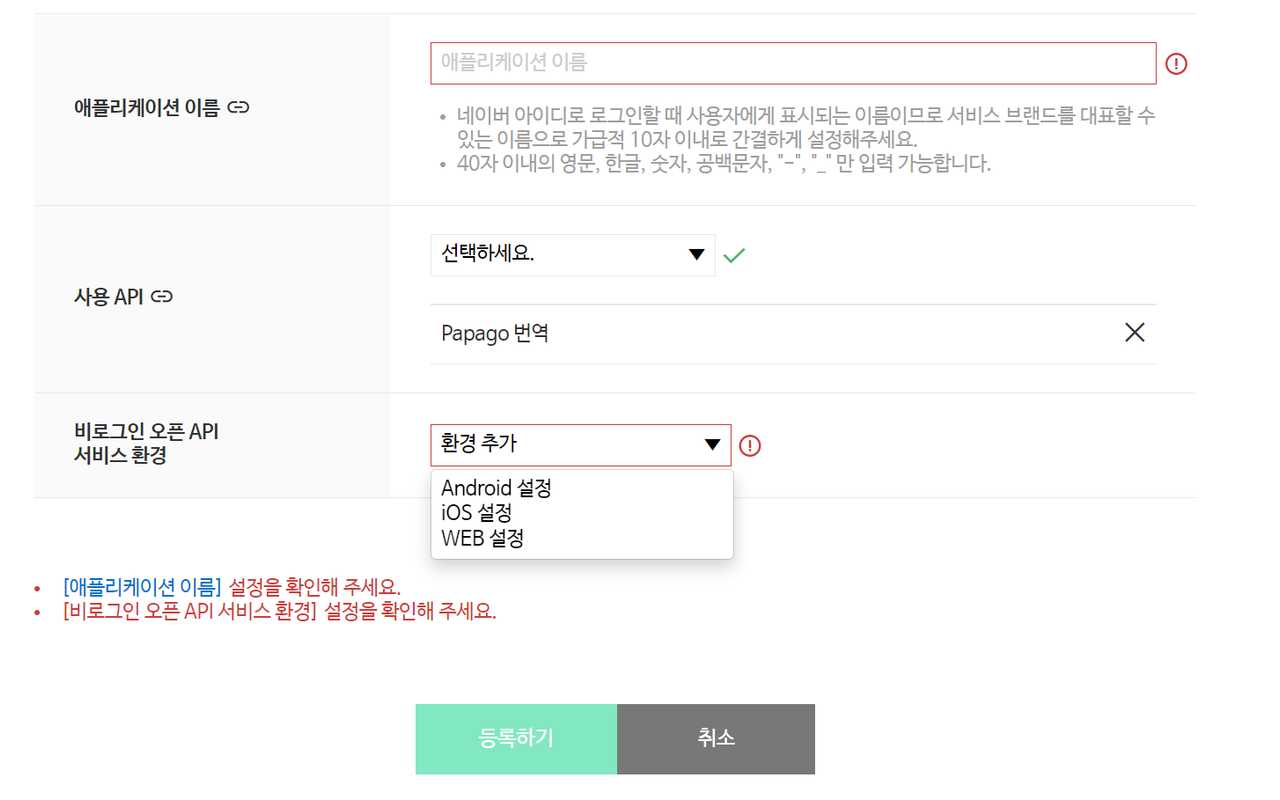
- 오픈 API 서비스 환경을 설정해 주시면 됩니다.
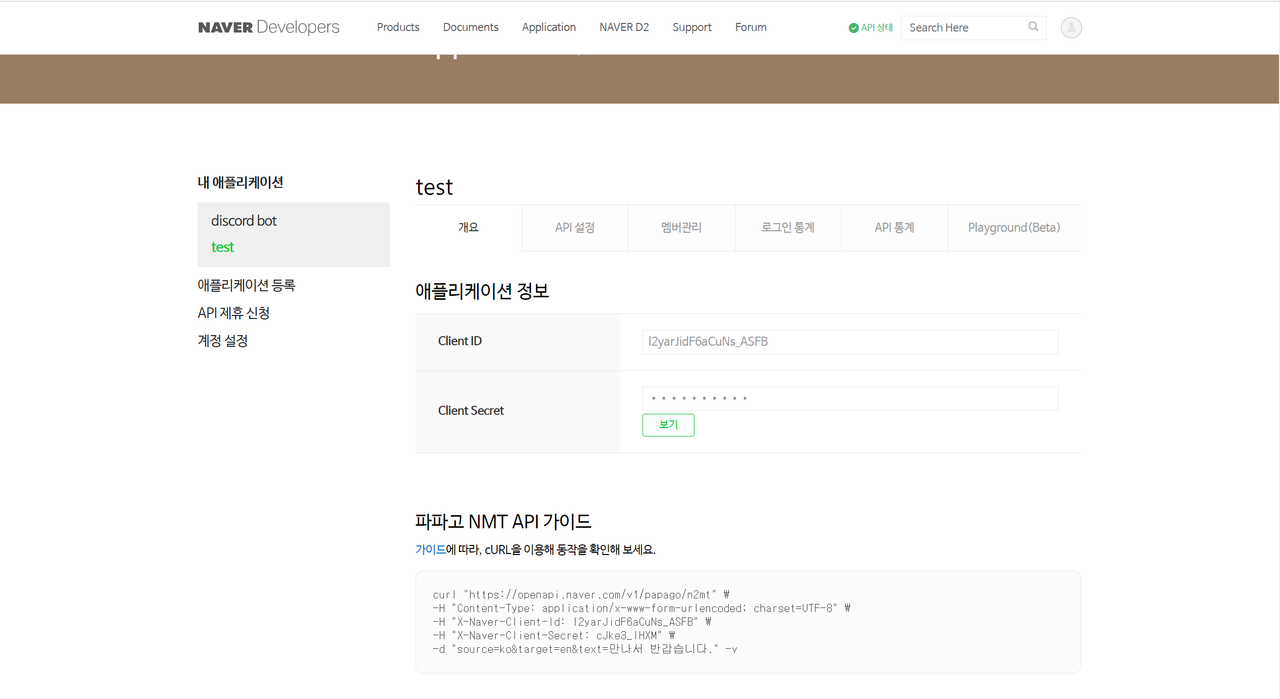
Client ID와 Client Secret는 API를 호출할 때 사용하기 때문에 따로 잘 적어둬야 합니다.
Papago API를 사용하여 번역기 Bot 만들기#
메시지가 입력되면 발생되는 이벤트 확인해보기#
메시지가 생성될 때마다 messageCreate 이벤트가 발생합니다. mssageCreate 이벤트는 많은 정보를 가지고 있습니다.
다양한 API들은 https://discord.js.org/#/docs/main/stable/general/welcome에서 확인할 수 있습니다.
메시지 창에 hello 라 입력할 경우
이런 객체가 반환이 되는데 이걸 활용하여 간단한 응답을 해주는 코드를 작성해 보겠습니다.
위 코드는 채팅창에 ping이라고 입력을 해주면 bot이 pong이라고 답장을 해주는 코드입니다.
이걸 활용해서 번역을 해주는 코드를 작성해 보도록 하겠습니다.