Create React App
2021-09-07#
List#
- Give Feedback While Logging In
- Create a Custom React Hook to Handle Form Fields
Give Feedback While Logging In#
로그인 하는중간에 사용자에게 피드백 주기
src/containers/Login.js
src/components/LoaderButton.js
src/components/LoaderButton.css
- isLoading = ture 일때 로딩 바 구현
src/containers/Login.js
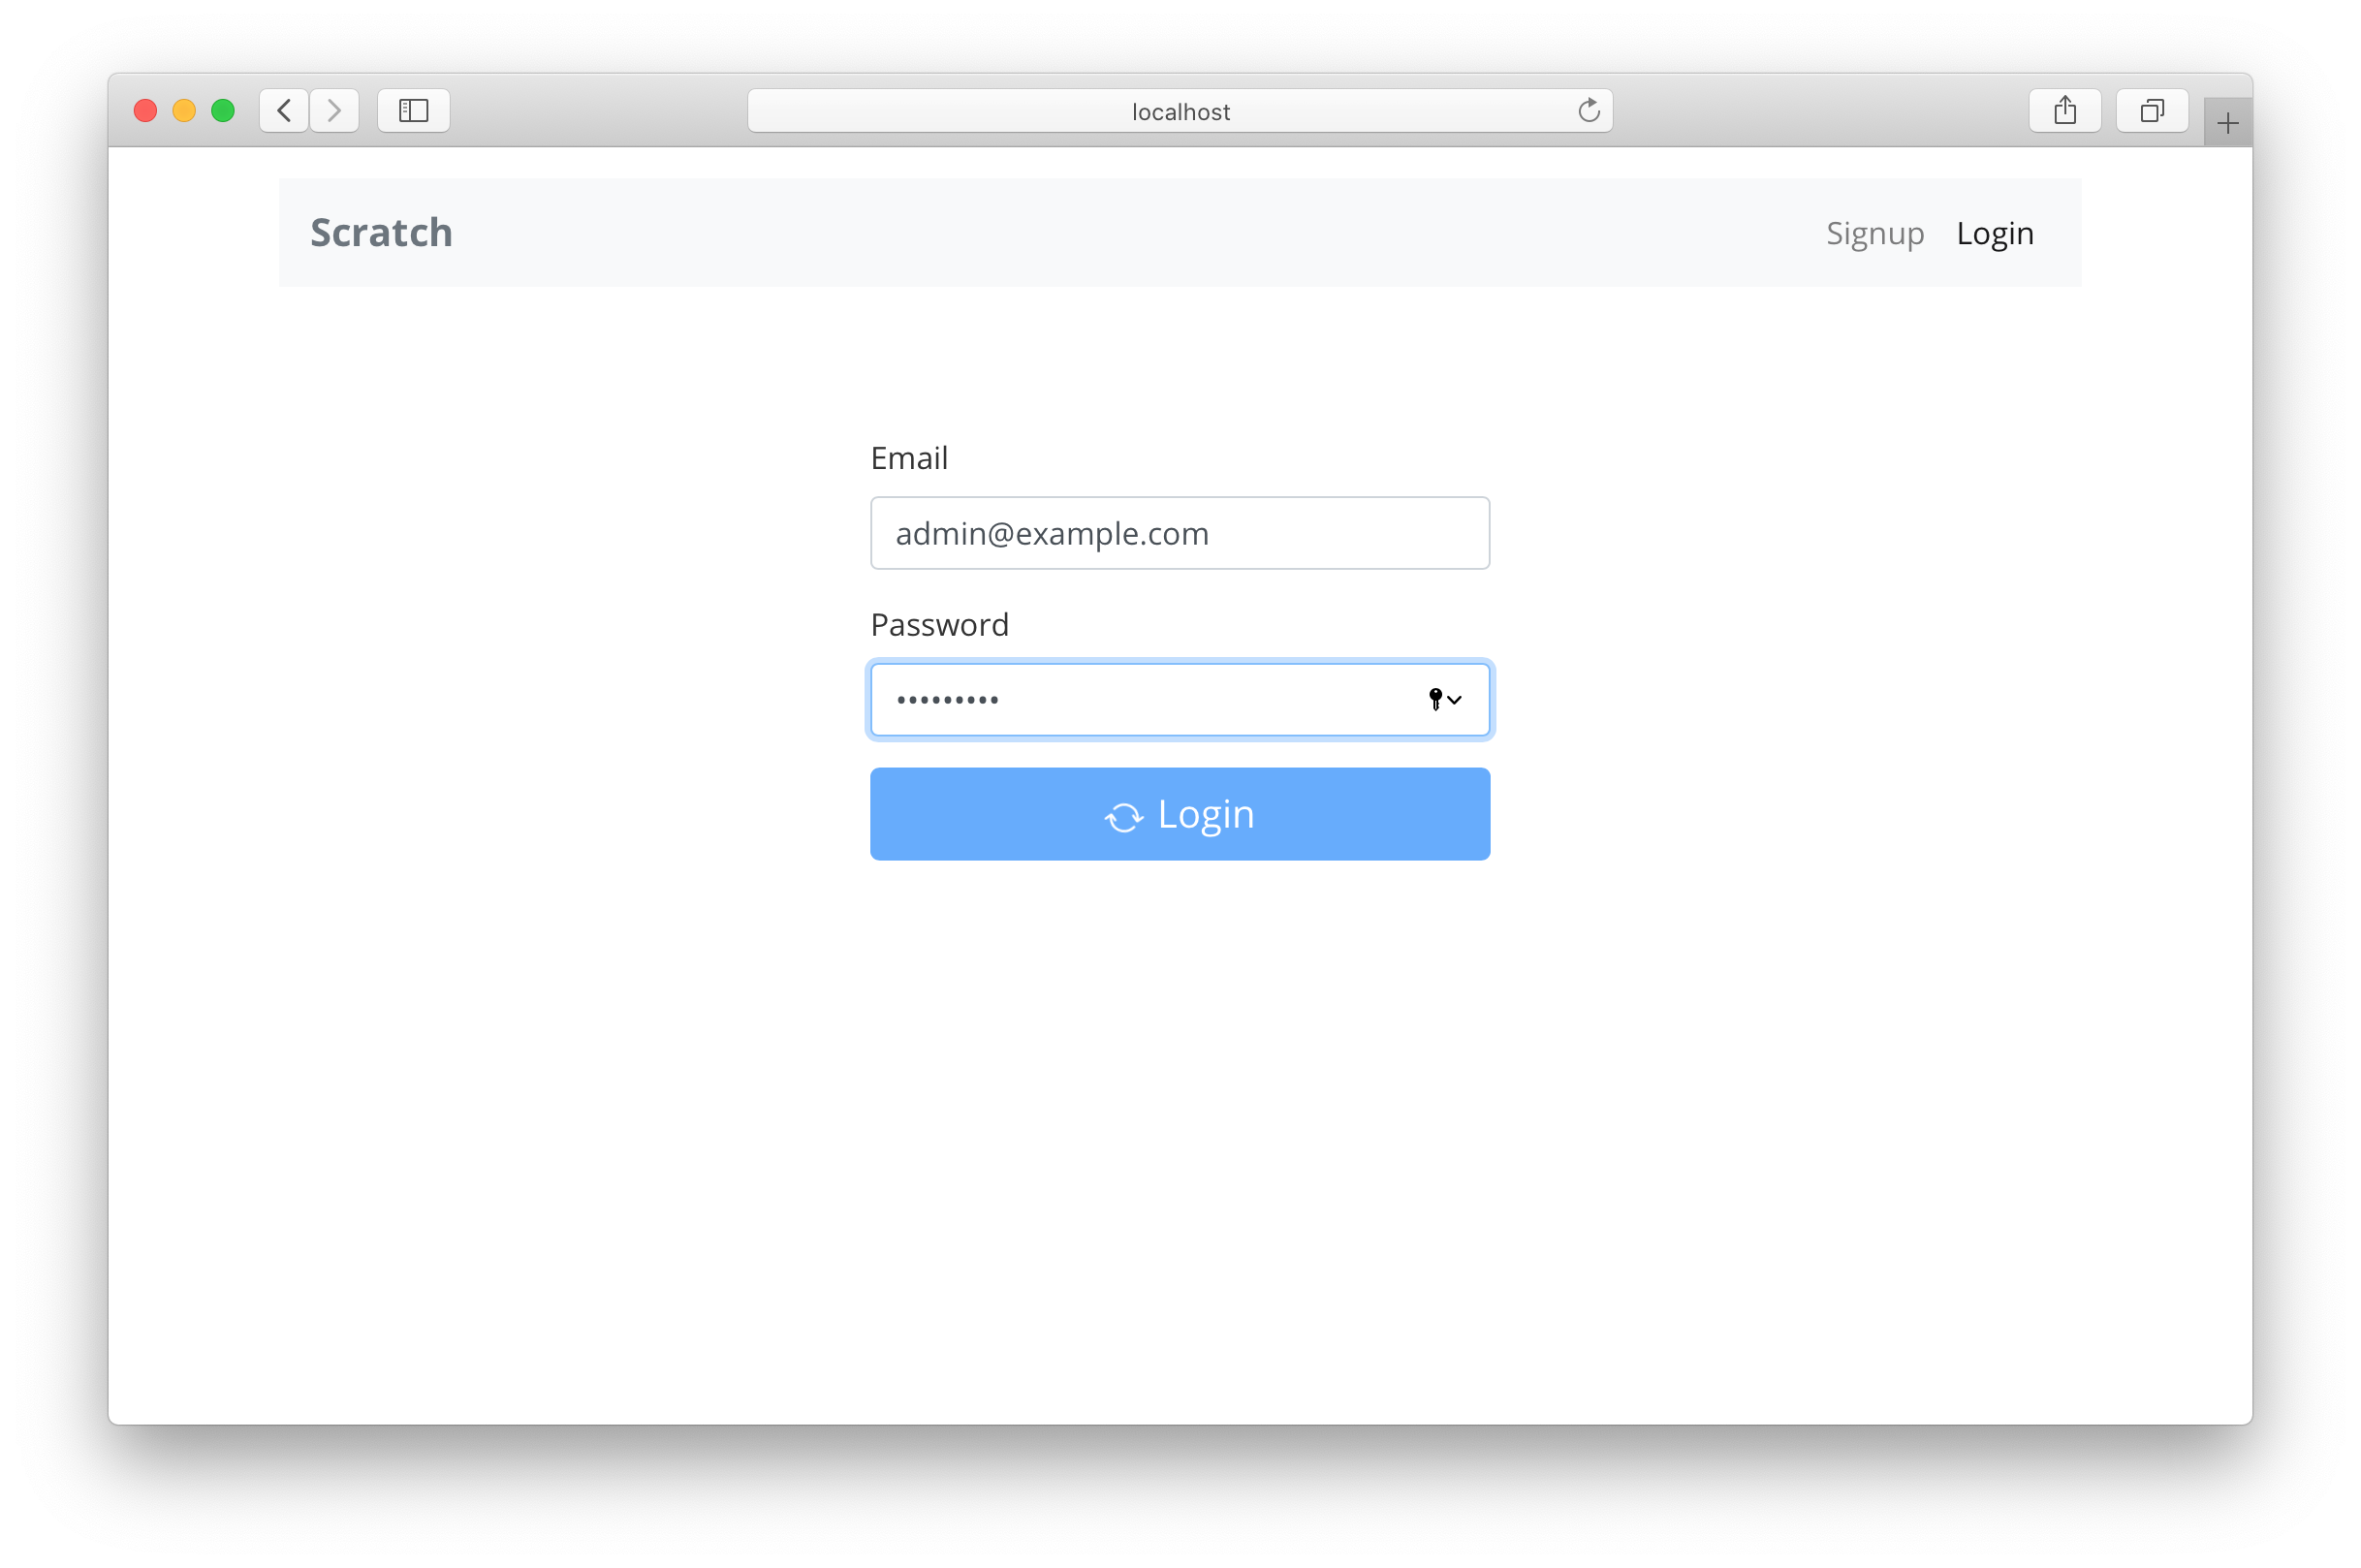
Handling Errors#
src/lib/errorLib.js
src/containers/Login.js
Create a Custom React Hook to Handle Form Fields#
가입 페이지에 대해 유사한 작업 및 공통 수행작업을 위해 Custom Hooks 작성
src/lib/hooksLib.js
src/containers/Login.js
2021-09-14#
List#
- Create a Signup Page
- Create the signup form
- Signup with AWS Cognito
Create a signup page#
가입 흐름#
사용자는 이메일, 비밀번호를&비밀번호 확인을 입력
AWS Amplify 라이브러리를 사용하여 Amazon Cognito에 등록하고 사용자 객체를 Return
그런 다음 AWS Cognito에서 이메일로 보낸 확인 코드를 수락하는 양식을 렌더링
AWS Cognito에 확인 코드를 전송하여 가입을 확인
새로 생성된 사용자를 인증
최종 세션으로 앱 상태를 업데이트
Create the Signup Form#
src/containers/Signup.js
src/containers/Signup.css
Add the Route#
src/Routes.js
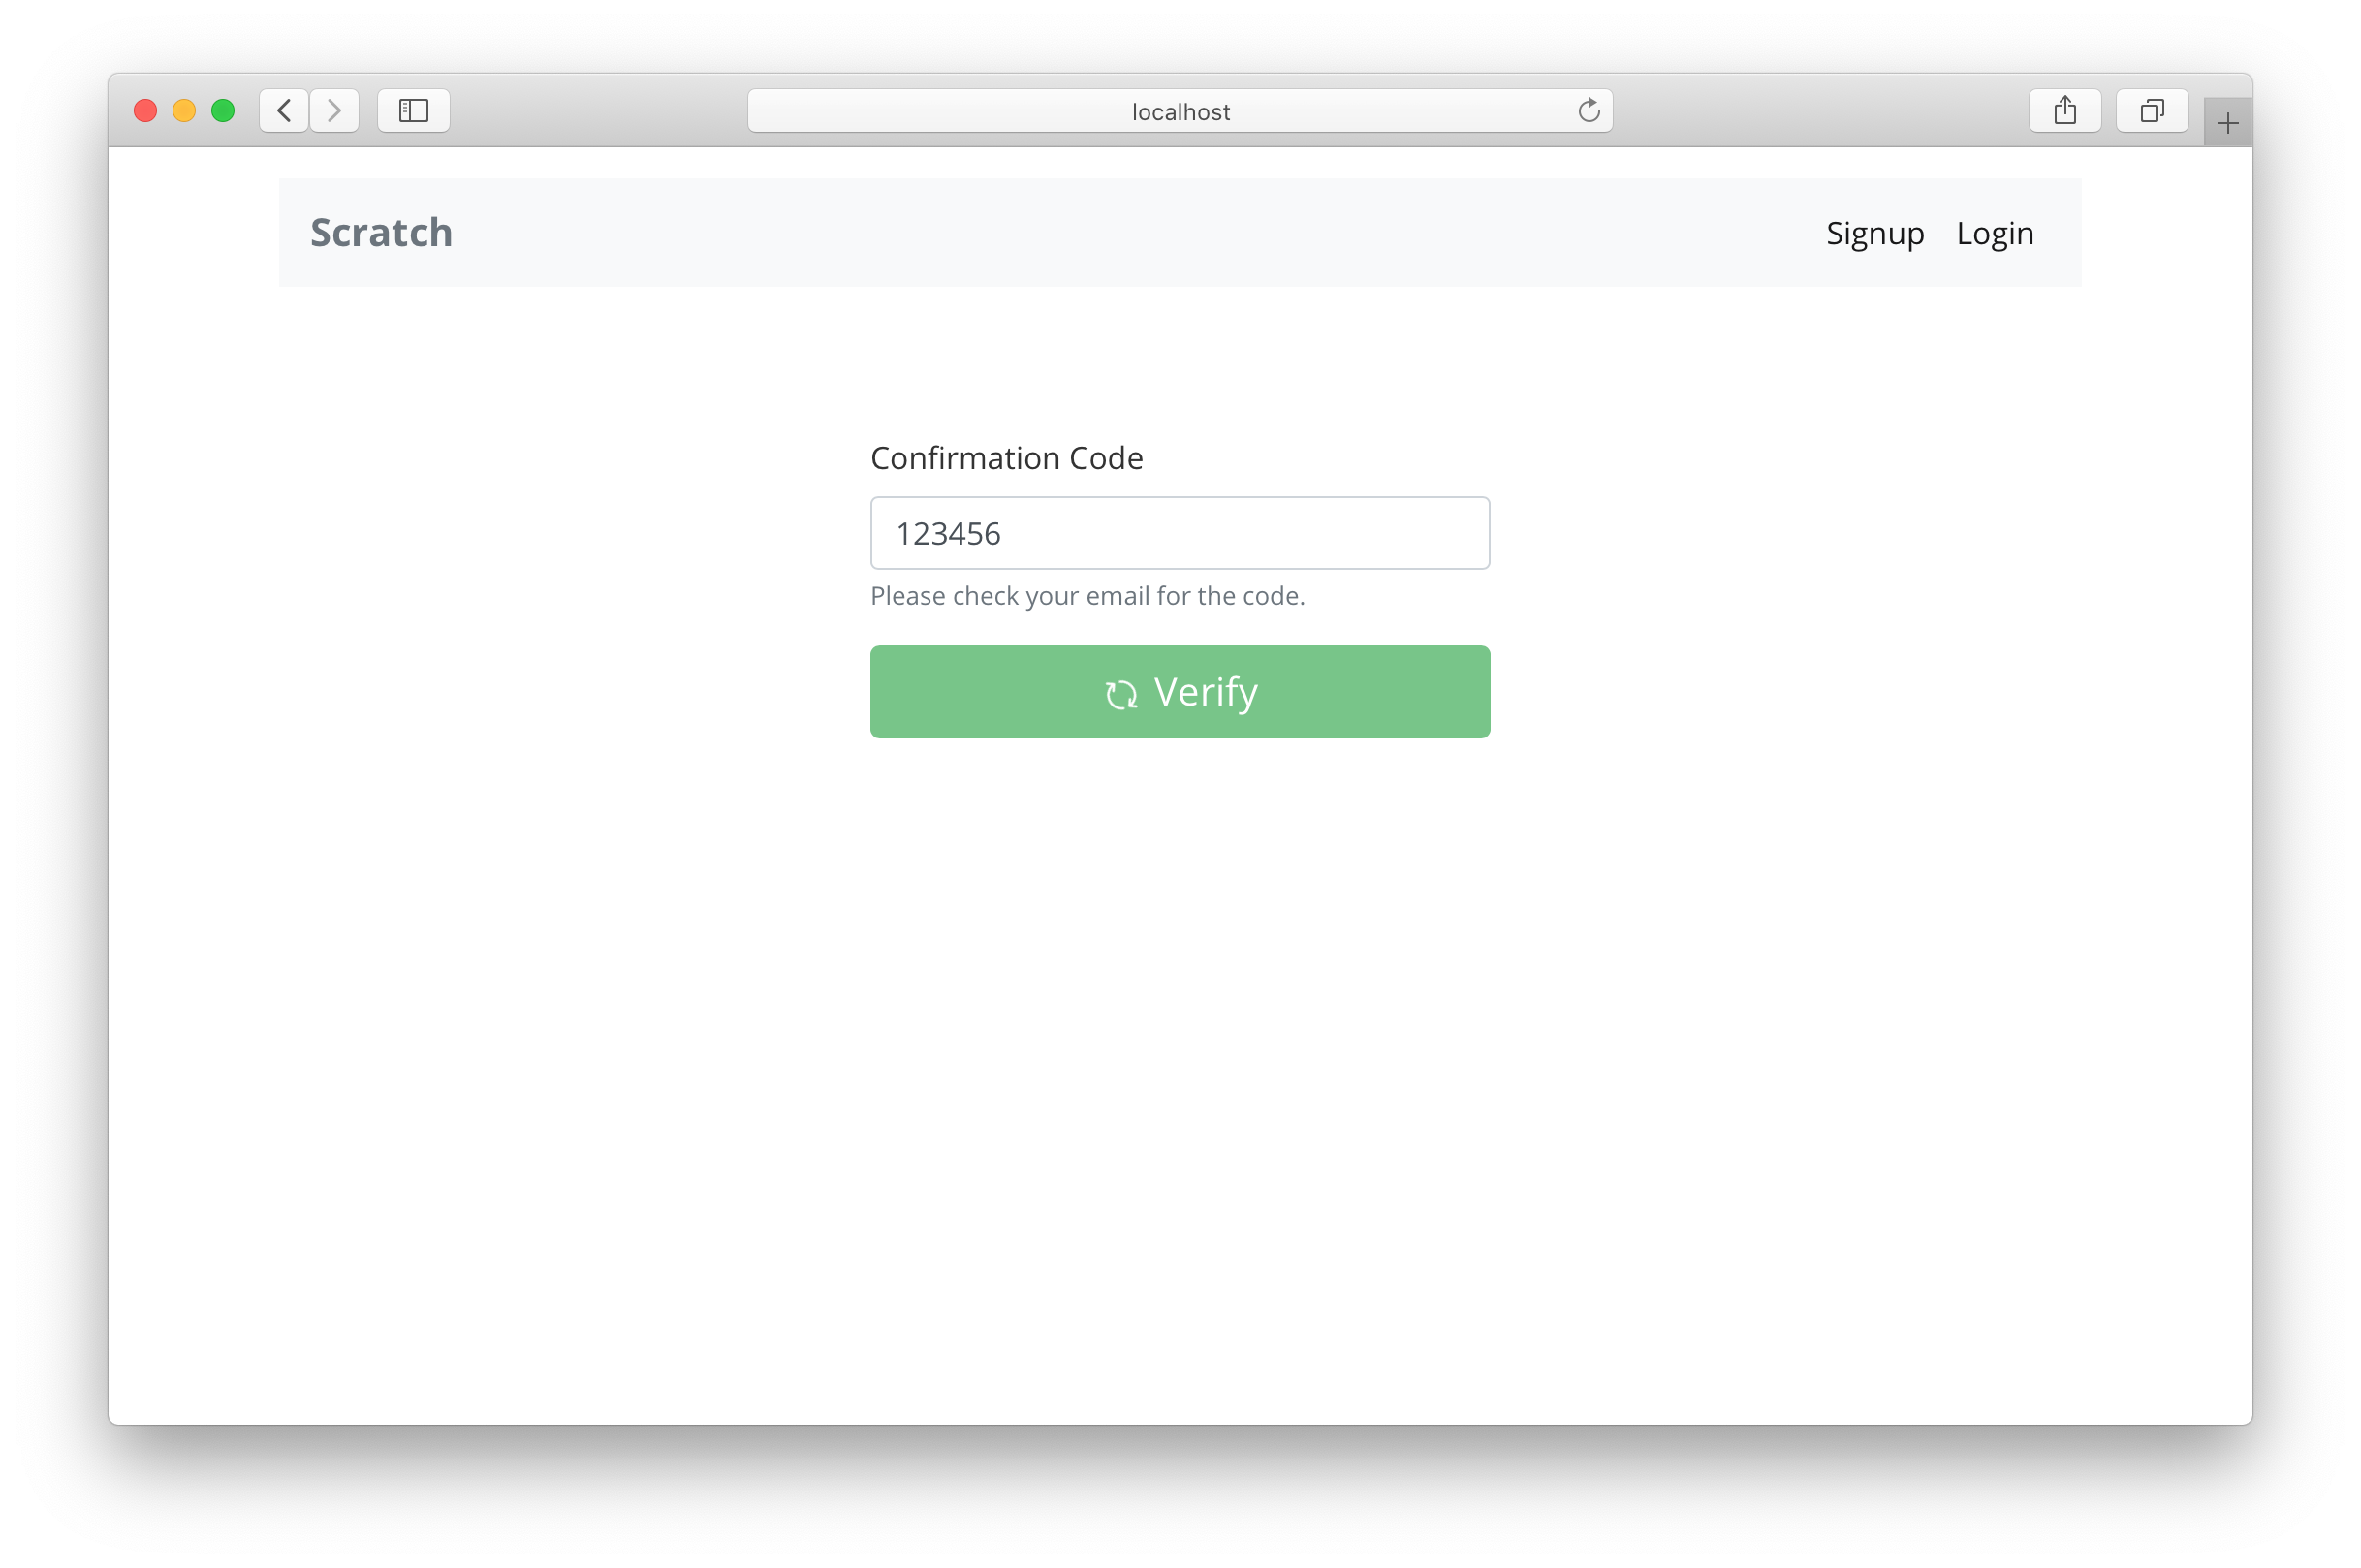
Signup with AWS Cognito#
src/containers/Signup.js
Sign Up 흐름#
handleSubmit 사용자가 Auth.signUp() 을 통해 새 사용자 생성
setNewUser를 사용하여 해당 사용자 객체를 상태에 저장
Auth.confirmSignUp()에서 사용자의 전송코드 확인
사용자가 확인되었으므로 이제 Cognito는 앱에 로그인할 수 있는 새 사용자가 있음
이메일과 비밀번호를 사용하여 로그인 페이지에서 했던 것과 똑같은 방식으로 Auth.signIn() 호출하여 인증
userHasAuthenticated 함수를 사용하여 앱의 컨텍스트를 업데이트
마지막으로 홈페이지로 이동
2021-09-28#
List#
- Add the Create Note Page
- Call the Create API
- Upload a File to S3
- List All the Notes
Add the Create Note Page#
Add the Container#
src/containers/NewNote.js
src/containers/NewNote.css
Add the Route#
src/Routes.js
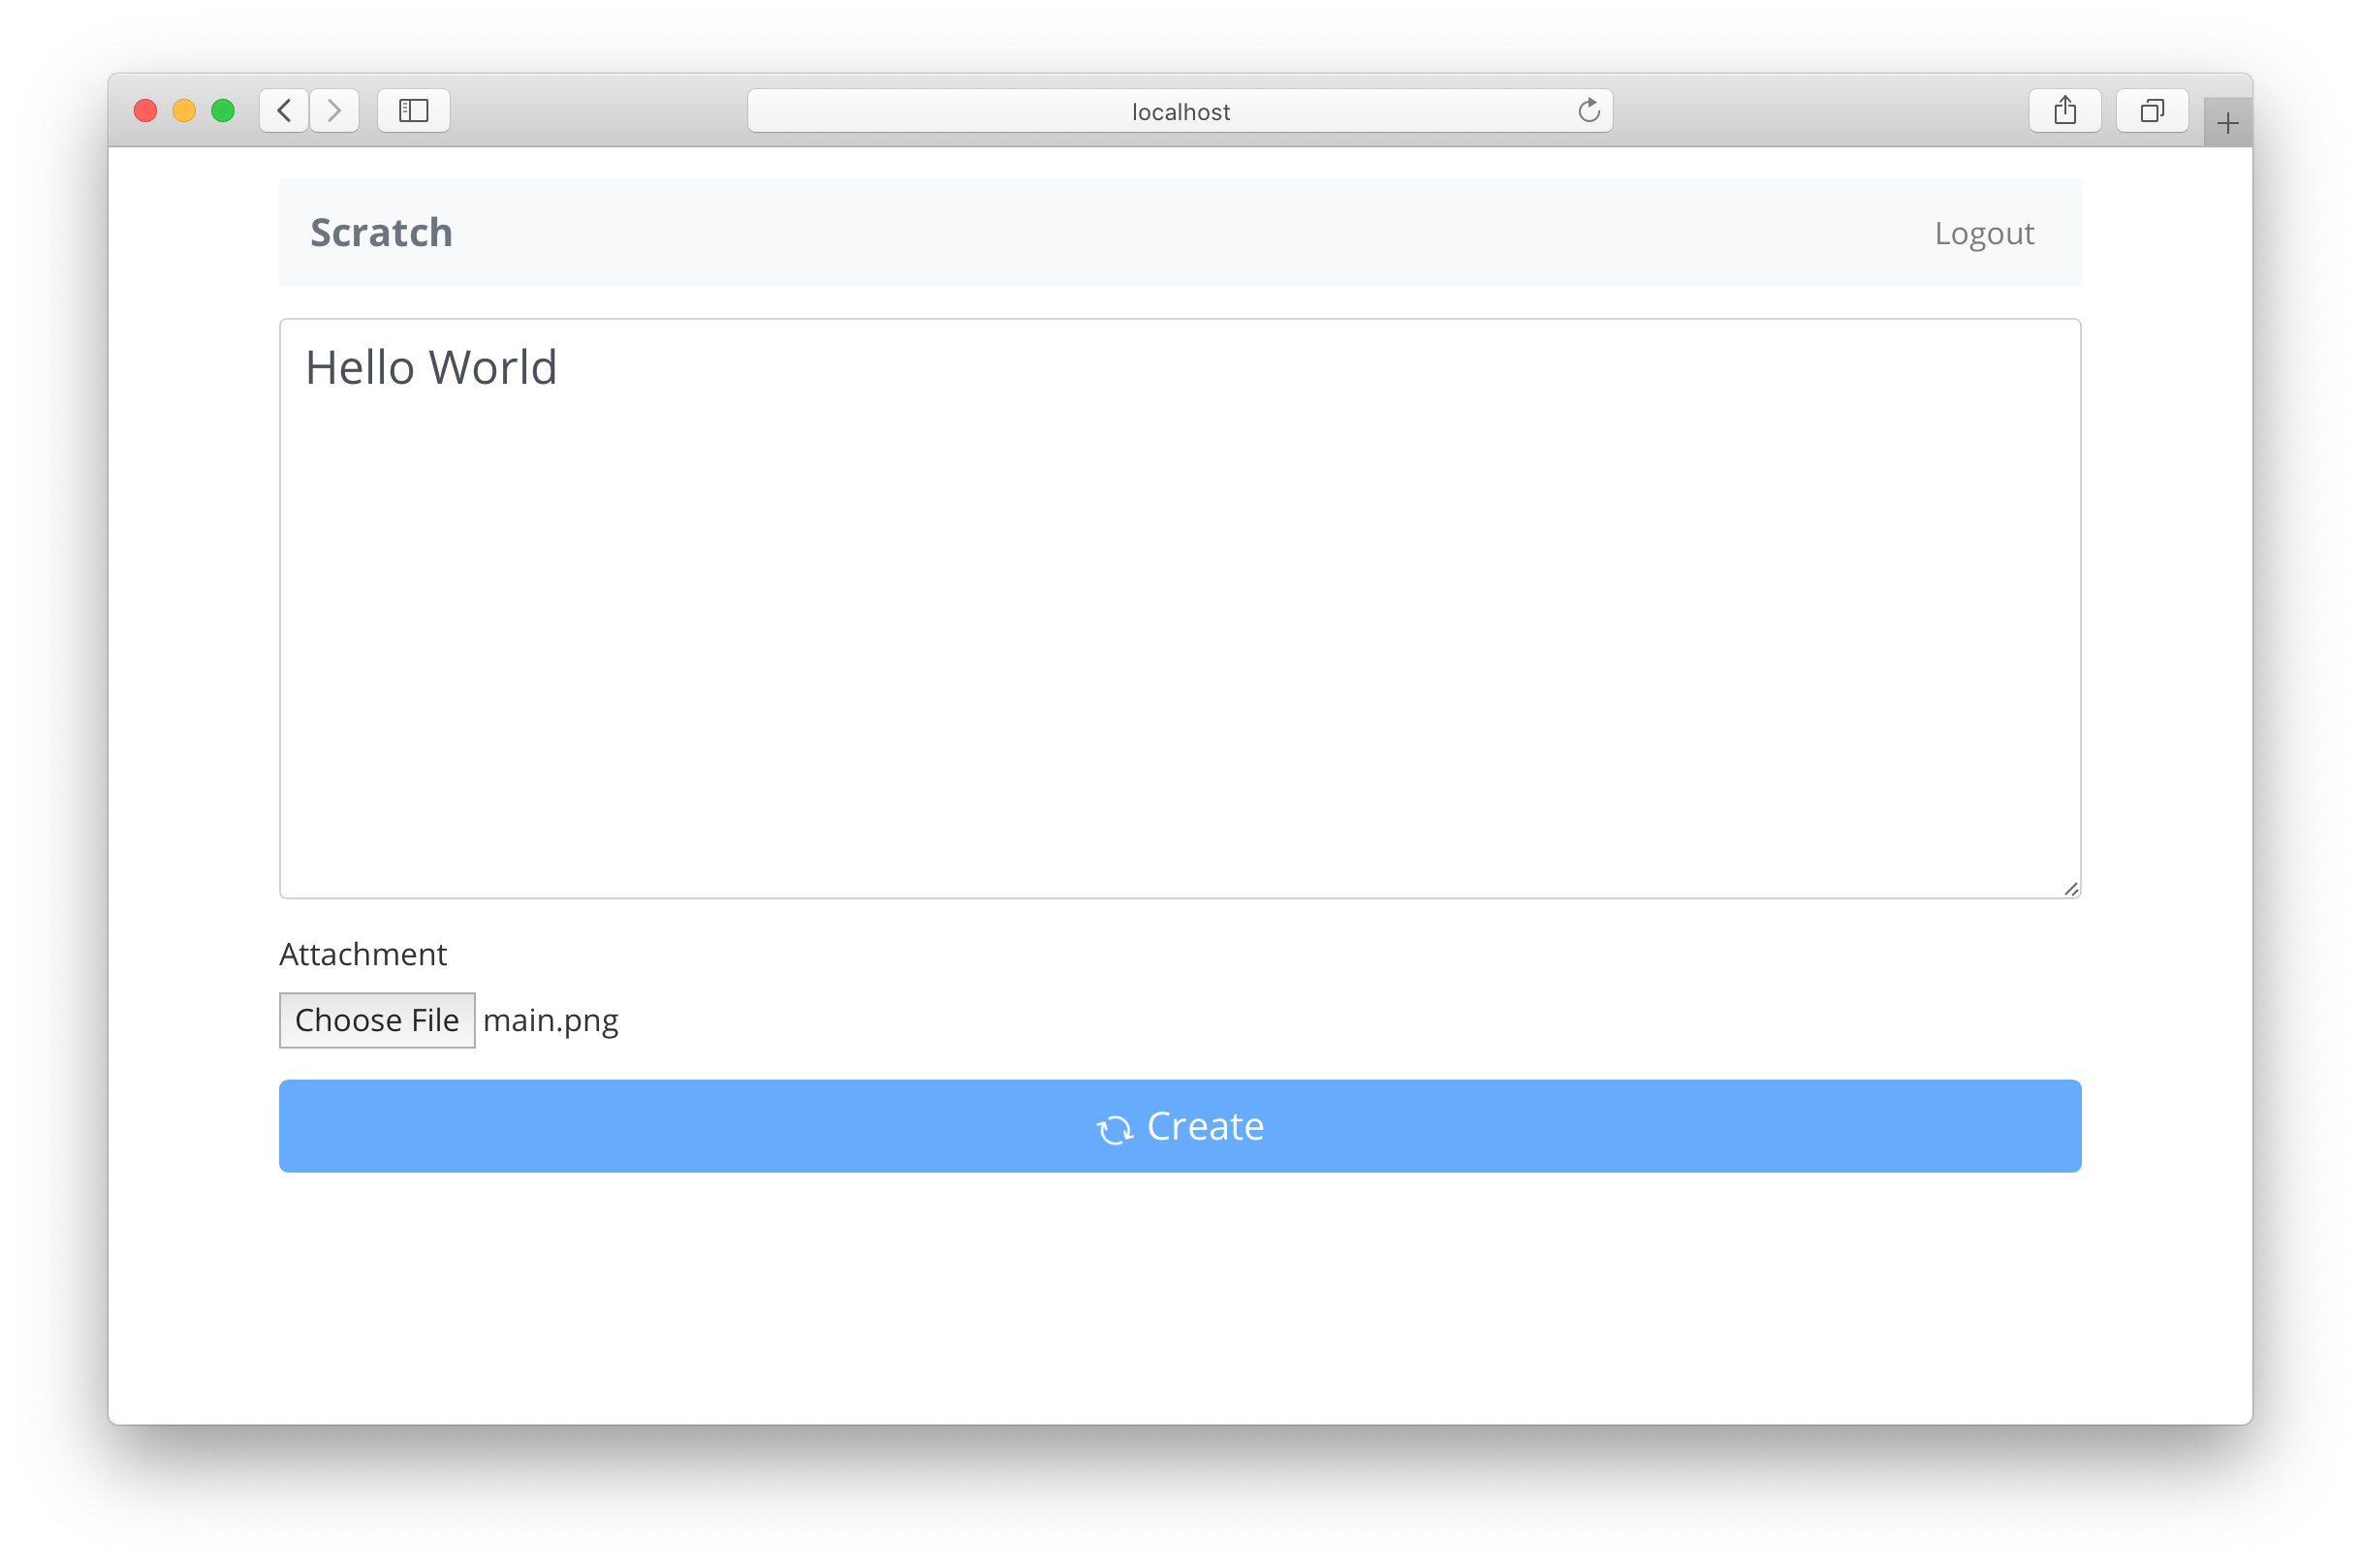
Call the Create API#
src/containers/NewNote.js
Create Note 흐름#
메모 객체에 createNote POST 요청을 /notes 주소에 전달 함으로써 생성 API 호출 진행, API.post()메서드에 대한 처음 두 인수 는 notes및 /notes (AWS Amplify 구성 장에서 이러한 API 세트를 이름으로 설정했기 때문에 notes이다.)
Memo Object는 단순히 메모내용만 전송
마지막으로 메모가 생성된 후 홈페이지로 리다이렉션 진행
Upload a File to S3#
- 사용자가 업로드할 파일을 선택
- 파일이 사용자 폴더 아래의 S3에 업로드되고 키를 Return
- 파일 키를 첨부 파일로 사용하여 메모를 Create
src/lib/awsLib.js
- 파일 객체를 매개변수로 사용
- 현재 타임스탬프( Date.now())를 사용하여 고유한 파일 이름을 생성 (물론 앱을 많이 사용하는 경우 고유한 파일 이름을 만드는 가장 좋은 방법이 아닐 수 있다.)
- Storage.vault.put()객체를 사용하여 S3의 사용자 폴더에 파일을 업로드, 또는 공개적으로 업로드하는 경우 Storage.put() 방법을 사용할 수 있음
- 저장된 객체의 키를 반환
Upload Before Creating a Note#
src/containers/NewNote.js
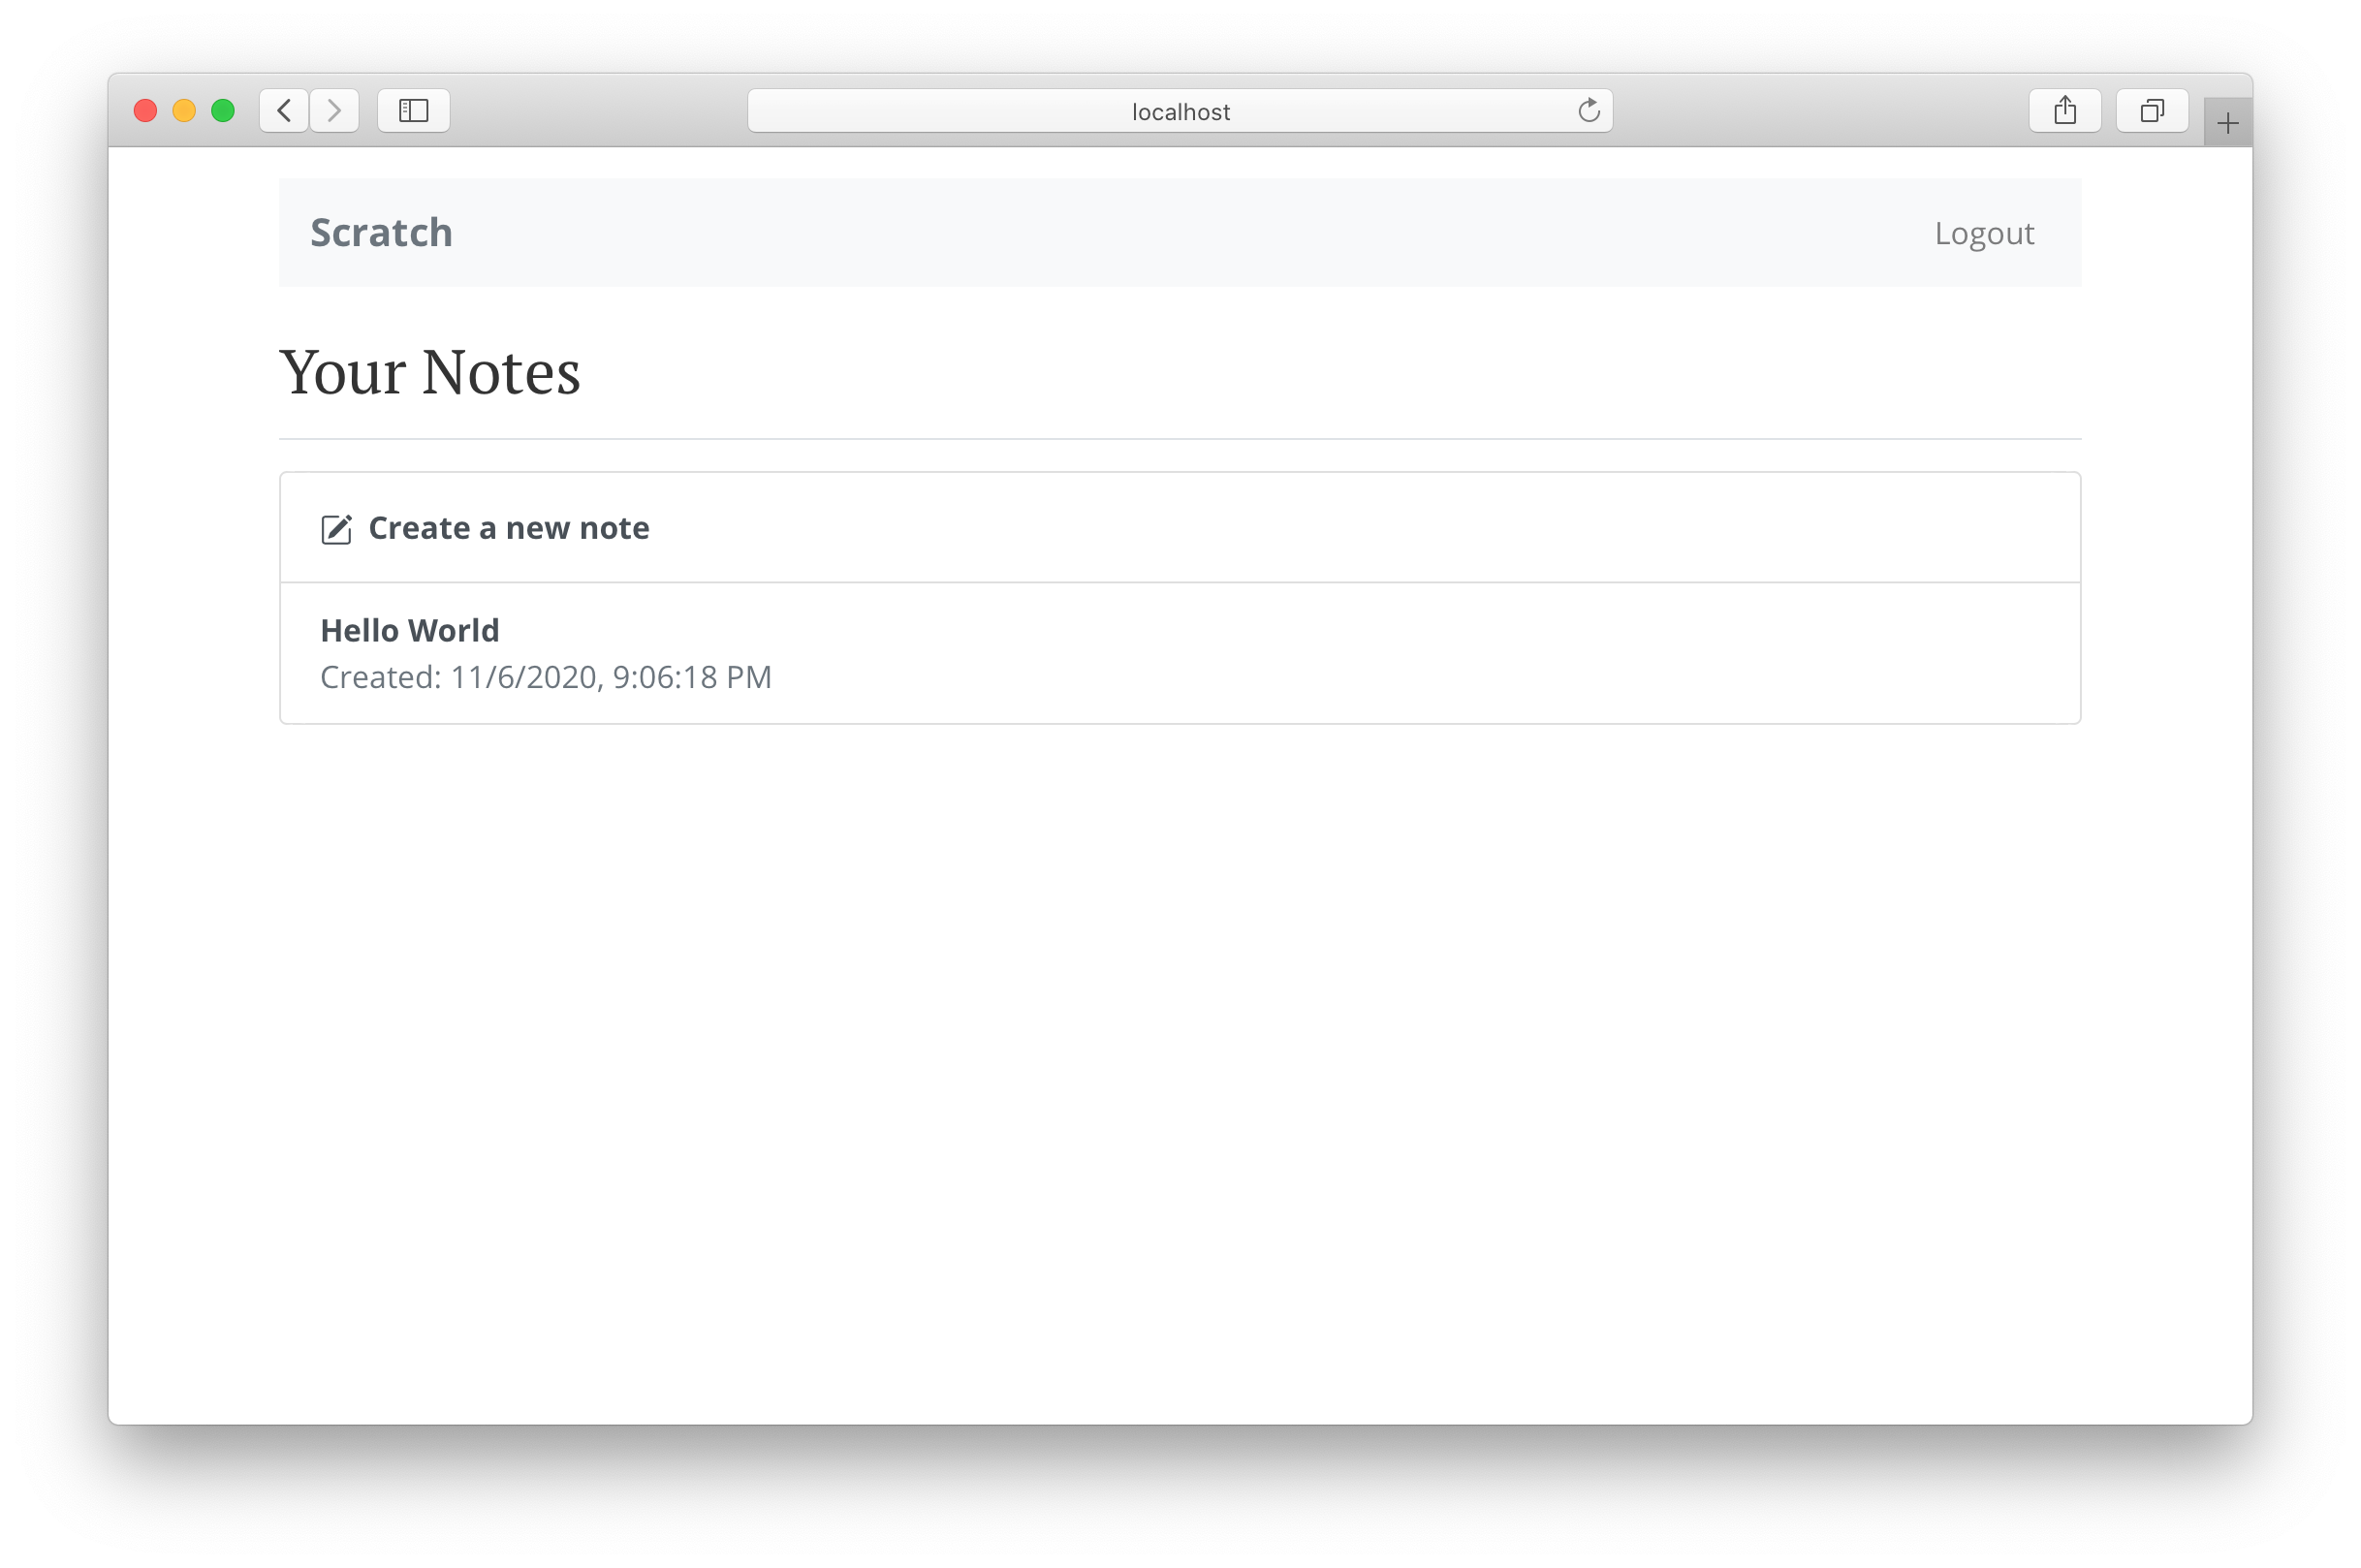
List All the Notes#
src/containers/Home.js

Call the List API#
src/containers/Home.js